Warning: very long, picture-heavy post ahead!!
Last weekend, I had the opportunity to go waaaaaay out of my comfort zone in terms of photography. A friend of mine, whom a lot of folks know as “Slim Katie” from her Runs for Cookies blog, needed some portrait photography done for a project she is working on, but the deadline was very short. My love of photography has become pretty well-known throughout my circle of friends, so I guess I shouldn’t be surprised that Katie thought of me when this opportunity arose. Still, when she emailed me last week to say that she needed this favor, I was torn between been happy to help and being nervous as hell!
First, the background: Katie and I met three years ago when she and a mutual friend of ours created “Winers,” a wine club where a bunch of women get together to learn about wine (and drink it, of course!). On other parts of my blog, you will read that the final leg of my exercise and weight loss journey, where I lost the last 30 pounds and started a serious exercise program, was inspired by a “friend” who had lost 125 pounds and became a runner along the way. Katie is that friend. 🙂
I’ve been able to watch Katie in her journey, and I always enjoyed hearing her stories of weight loss and fitness at Winers. After seeing her on the Dr. Oz show in November, I was positively inspired by the amazing things she’s accomplished through her weight loss. I realized that if a “real” person like Katie could accomplish the goals she had set and find so much success as a result of it, there was no reason I couldn’t change my lifestyle to become a healthier, happier, thinner version of myself, too! So when Katie asked me for a favor, I knew it was a great opportunity for me to repay her for her positive influence in my life.
Now, if you’ve read any of my photography posts, you’ll know that I’m not very confident in my photographic abilities. I feel like I’m getting better at hockey photography, and I think my landscapes and object photography have some promise. (One of my landscapes did win a first place at the county fair last year, which I love to say because it makes me sound like the “hick” that I’ve always wanted to be!). But for all that, the one area that I absolute struggle with is portrait photography.
For the record, I LOVE portrait photography, and I actually have a photographer that our family has been going to once or twice a year for the last 8 years. Some folks question why I don’t do it myself (especially now that I have a Canon 60D), and I always answer that I could never do as good a job as he could, with his 20+ years of professional experience.
Last year, my cousin’s wife asked me if I would do her son’s senior pictures. I flat out refused, explaining to her that there was just no way I could let her trust such important photographs to someone who is such an amateur. She was pretty insistent, but the thought of doing someone’s senior pictures just put me in a panic!
Because of my insecurity, I briefly considered telling Katie no, but I knew that she wouldn’t have asked me if a) she didn’t think I could do it, and b) she didn’t need me! So, I said yes, and then I spent the next several days stressing and researching. I did online research regarding portrait photography, I read and then re-read the “Portrait Photography” chapter in the book I bought last year about my Canon 60D, and I even asked the professional photographer on DS#1’s team for advice. And yet, after all this, I was still a nervous wreck when it came time to take the pictures!
I did garner a few tips from my research that I thought were useful:
- Go outside to use natural light whenever possible. (I pretty much knew this one, but was surprised to find it mentioned in ALL the places I used for research, from online to the professional photographer!)
- Get above your subject, using a stepladder or stool. So even though it was a pain, I bought along a step-ladder!
- Use the automatic settings. Now, this one was kind of mixed. My internet research and the pro both suggested this, but my book specifically said to use the Av setting on the camera. More about this later.
- Keep your subject relaxed. Well, I suppose if things got tense, I could always talk about wine, lol. 😉
- Keep your camera steady. This one was a no-brainer…I brought my tripod!
Katie picked the location, which was a Metropark in our area, and it was perfect! There was water, trees, grass, pretty much everything you needed to make for a great portrait backdrop! It was a gorgeous location, a fairly short drive from my house, and I had never known about it! I kept exclaiming about how awesome the location was the whole time we were getting set up. 😉
At that point, the fun really began for me. I spend a lot of my life taking pictures, and I often feel that people get sick of me taking pictures of them, especially because I’ll take a dozen pics of the same shot to get “just the right one.” I know for a fact some people get annoyed with that facet of my personality, especially my two favorite people to photograph: my boys. :-p
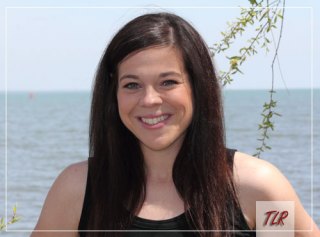
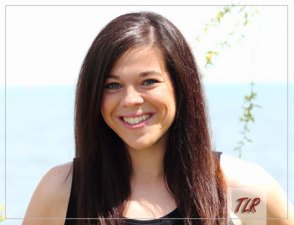
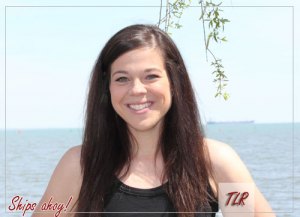
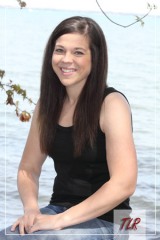
So, for someone to actually be patient enough for me to take picture after picture, trying for just the perfect shot, was like a dream come true! When Katie asked me where to stop, I pulled out my camera and began looking around with my “photographer’s eye”—it was amazing how many “good” spots I could see. Water is always one of my favorite backdrops, so we started with a few shots of her with her back to the water.
(Note: I’ve added a photo plugin that will allow you to click the pictures to enlarge without leaving the page.)
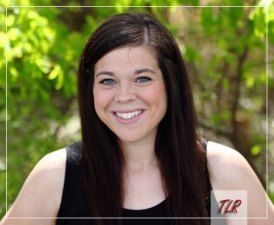
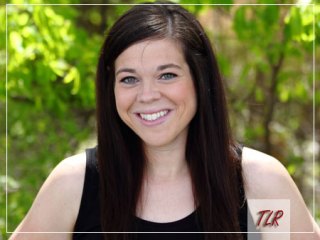
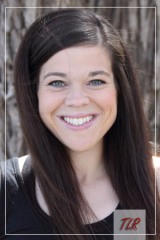
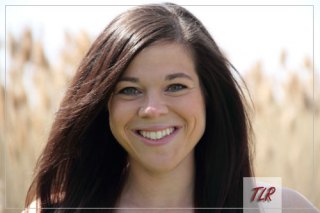
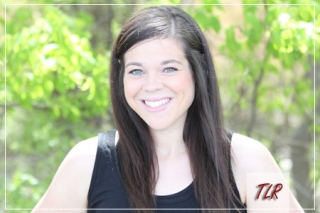
I loved the backdrop, and I was especially amused by the boat in the background (see the last shot). 😉 I was also quite excited about how well Katie photographs. I have taken quite a few pics of Katie over the last three years at Winers, and I always marvel at how great she looks in them, but on that day, when my sole purpose was to photograph her, I was almost giddy at how easy it was to take her picture! She has wonderful features, with a beautiful, natural smile, long, dark hair and stunning green eyes.
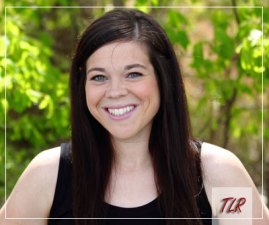
I had her stand in a few different spots with the water in the background, and then we turned around and did some with some trees and shrubbery as backdrop. Again, Katie’s dark hair made it easy to switch backgrounds and go from blue to green. It was at this point that I remembered that I had brought the stepladder. I grabbed it and stood on the first step, which was only about 3 or 4 inches off the ground, but I was stunned at what a difference it made!
It’s so subtle you almost can’t tell, but I definitely think those 4 inches made a difference. That was one thing I learned that I am definitely going to use again. I’m very glad that carting around that stepladder was worth it, lol!
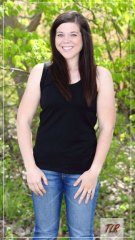
I played around with zoom on these shots, some close, some farther to include from the waist up, and a couple of full-length shots just for her to have. I knew she wanted “head shots” mostly, but I thought since we were there, we might as well do a few different poses and have some fun!
For those who don’t know, that “blurry background” you see in a lot of portrait shots is called “depth of field,” and it’s one of the things a DSLR camera does very well. The trick is to make sure your subject is far enough away from the background to ensure that, when you zoom in on them, the background wont’ be in focus. It’s a neat aspect that I’ve enjoyed about my Canon! I used my longer lens for many of these pictures to help increase the depth of field even more…
After those shots, she asked me what I wanted to do next, and I because I just couldn’t seem to stop taking pictures (LOL), we went back to the water. I wanted variety, so I asked her to sit on a big rock. (I was so demanding, lol, but it was just so much fun!) We joked about how it felt like a senior portrait shoot, but I do think she’s youthful enough to pull it off!
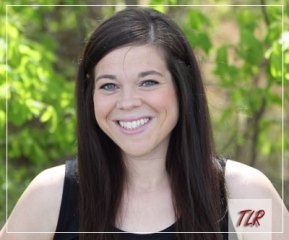
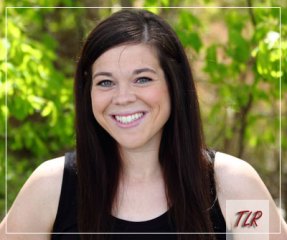
I tried a few with a big tree in the background, and I liked that look, too. I think the simpler the background, the better, and this really helped focus on her beautiful face.
I loved this shot, but I wish I would’ve photoshopped that stray strand of hair off her forehead before I sent it to her, lol!
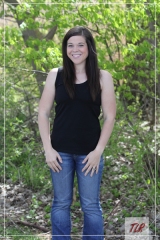
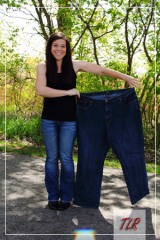
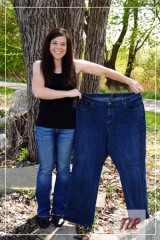
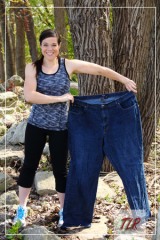
After that, Katie wanted to have some pictures with her old (pre-weight loss) jeans. This shot was a bit trickier, because it required a wider-angle view, and since I couldn’t zoom in, that meant that the background would be more in focus. I struggled with what background would work without being too distracting. I decided to both the shrubbery and the big tree (oak? I don’t know…). In retrospect, I can think of a few other spots there that might have worked better, but I think those two spots worked out okay.
(note the patch of rainbow sunlight at the bottom, which annoyed the piss out of me!)
(I liked this one better)
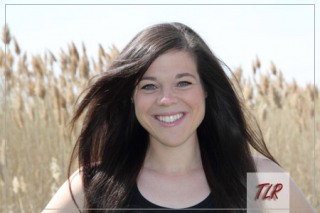
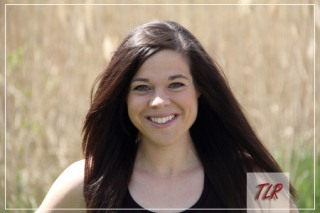
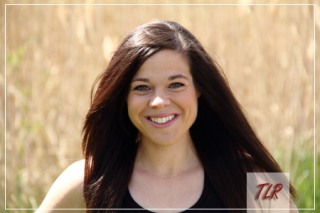
At this point, I knew it was probably time to have her change into her running clothes for the running shots, but I had had this crazy idea while we were shooting that I just couldn’t shake, and I asked her if we could go over by the tall, tan grass that was in the “swampy” area. She was so incredibly patient with me and agreed. In that particular spot, the wind was blowing (previously the wind had pretty much been blocked by the trees), and after I took a few shots, and I was really excited.
I was so giddy about the way these photos were turning out, I was squealing in delight. (As anyone will tell you, it doesn’t take much to excite me! Again, I refer to my domain name… ;)) But truly, these were just amazing shots. Obviously, the beautiful model had a LOT to do with it, but this particular backdrop really set off her dark hair and beautiful face, and with the added effect of the wind blowing her hair, I was really tempted to yell out, “SCORE!” But I refrained. :p
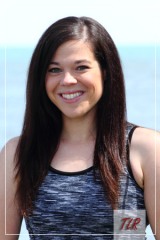
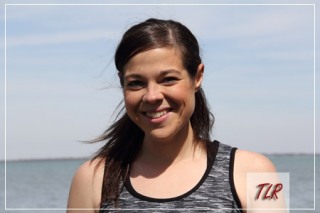
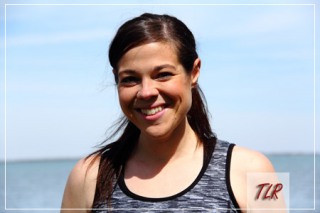
After that, Katie changed into her running clothes, and I asked to take a couple of head shots in that outfit.
Again, the water background just called to me, especially with the blue of the running top.
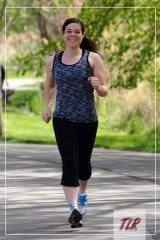
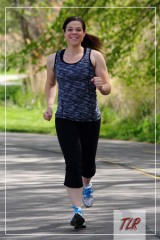
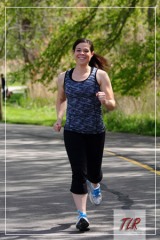
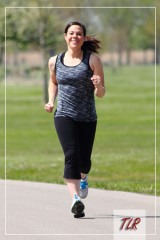
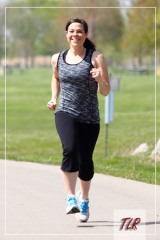
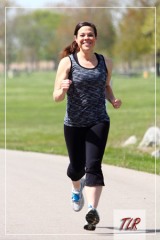
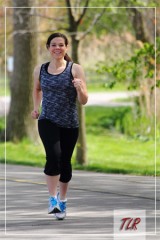
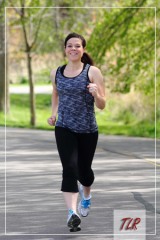
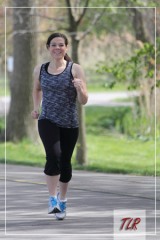
Then came the actual running photos. Believe it or not, for these I felt pretty comfortable. I have taken enough action shots at the hockey arena that I know how to set these up, and I knew that my tripod was my key. I used the tripod, the sports setting (because the lighting was WAY different than a hockey arena, so I didn’t want to take any chances of screwing it up!), and the high speed shooting option. The nice thing is that using the high speed option allowed me to take a gazillion pictures, and all I had to do was choose the best ones.
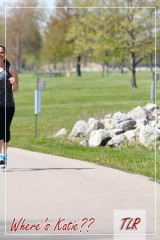
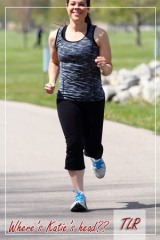
Okay, sometimes I messed up, ha ha!
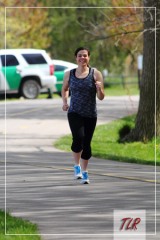
I had her run from two different directions to try to find the best backdrop. I definitely liked the forest shots better.
Except for the border patrol trucks in the background, lol!
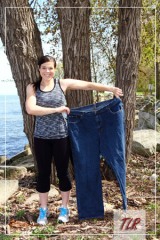
After that, we took a few jeans shots with the running gear, first with the water in the background.
No, no, no! Too distracting!
There, that’s better! Still busy back there, but the blue of the water isn’t fighting with the blue of her jeans, I think.
I did a few more shots of her with her hair pulled back in the tank top, but I wasn’t happy with how those turned out.
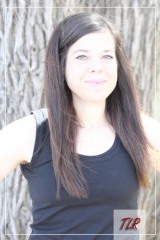
And therein lies my biggest struggle…lighting. You can see that the sun was out and shadowing her face, and since I really didn’t want to have her turn directly into the sun (ouch!), I had to live with the shadows. I’m starting to understand why all the reference material says it’s better to shoot on a cloudy day. I’m not sure I completely agree, because I think sunlight in general provides the best lighting, but I think a shady spot on a sunny day has a lot to recommend.
My other big struggle was the decision to use automatic versus manual shooting. This was probably my number one frustration. I wanted to use the manual setting, because, regardless of what the experts (including the professional) say, I know you get more control over your photos when you choose the settings yourself, and sometimes, you just need this control. Yes, camera technology has improved by leaps and bounds in the last 10 years, such that the “brain” inside can often figure out proper settings much more efficiently than the human brain. But you give up some things when using the automatic setting, such as the ability to set a focal point. I like setting my own focal point (such as Katie’s eyes), because I know what I want the focus of the picture to be. But I found that when I changed to the aperture priority mode (the one recommended for pictures), I had trouble with the exposure and lighting. I never seemed to be able to get the right settings to have enough light without it being too much. I tried using the fill flash at a reduced setting (the photographer’s suggestion), but the results were pretty disastrous.
See?? 🙁 I had it so that the camera set the ISO and the shutter speed automatically, such that I only picked the aperture value, and you can see that I totally messed this up. Argh.
The professional photographer actually suggested using the fill flash on the auto setting, but I could not for the life of me figure out how to force the flash on auto. It would not come up for me, even if I placed my hand in front of the lens to “fool” the camera into thinking it was dark. I finally gave up on that, and I just figured the automatic setting would know if it needed the flash.
And honestly, it kind of shames me to admit it, but for the most part, the automatic pictures did turn out better…
– my shot out of the camera, 1/250, f 4.5, iso 400, flash fired at -1, fl 105
– same angle at automatic settings
Now, obviously, the first one sucks. But I wasn’t completely thrilled with the second one (the automatic one) either. So I did some post-production processing in the Canon software and came up with this:
Personally, I tend to like things bright. (Maybe it’s an extension of my extroverted personality, lol!) Of couse, when you put the two of them side by side, each one has merits (hey, with a model that pretty, how can they not??), so I guess it’s just a matter of personal preference. There are other instances where I altered a shot taken on the automatic setting and ended up being happier with the original version.
original automatic setting
my shot after messing with it
For this one, I think the softer (automatic) version works better, maybe because it’s an extension of the “wheat-like” tan grass in background. My “amped up” version just seems to take away from the subject’s features. (Edited to add: while I was putting this post together, my husband was looking over my shoulder and proceeded to argue with me that the second, post-production version was better; he swears that the brighter colors bring out her features more and even commented on how shiny her hair looked. LOL, see…it’s all about personal preference!)
I will say that I think the running photos (all of which were taking using the sports mode, so all settings were automatic) were better with a little added infusion of brightness.
original with automatic (sports) settings
post-production with my alterations
Again, a lot of factors go into choosing what effects to apply during post-production, and individual taste has a lot to do with it. I will say that I now fully understand why a professional photographer can’t just take the card out of the camera and magically make pictures ready for viewing as soon as the shoot is done. I’m actually wondering how the pros at the hockey tournaments turn the pictures around so fast that you can view them at their booth right after the game! Maybe there’s software you can use to automate it to a degree? Or maybe they have a standard “recipe” of effects saved that they just blanket-apply to all pictures taken at a specific arena??
At any rate, this turned out to be a LONG post, but since I’m getting paid by the word here… 😉 (Ha ha ha ha, don’t I wish!!!) Actually, it was just such a fun experience for me to do this little “photo shoot,” it was easy to go on and on, and someday, when portrait shooting is second-nature to me, I’ll be able to look back on this and remember how far I’ve come.
One can hope, anyway!!!!!!! 😉
Thanks for reading. 😀

How fastinating, Steph. You did a marvelous job, really!
Jenn
Thank you, Jenn!! I appreciate the kind words, my friend. <3
Maybe I need to visit and have an awesome photo shoot too! Congrats to Katie too, she looks fabulous and I can tell by her smile that she is just as fabulous on the inside too.
Thank you Jenn…you’re right on all accounts! 🙂
As a reader of Katie’s blog for a long time (and a new reader of your blog :)) and a “wanna be” photographer, I found this post so interesting!! Thank you for such a detailed post! I’ve caught up on your blog a little, too – you’ve done a fantastic job on the weight loss front as well!
I have a Canon Rebel T3i and got a new lens for it for Christmas. I want to take a class or something because I find myself getting so overwhelmed and frustrating trying things on my own. My three boys, family and friends get so annoyed because I’m constantly taking pictures and trying to get that “perfect shot”. 🙂
Lisa, you are a woman after my own heart!! I, too, love to annoy family and friends with my quest for the perfect shot. You are definitely among friends here. 😉 My goal is to take a class, too. SOMEDAY!!
What lens did you get?? I have a friend who has a Rebel, and I think it’s the same model as yours, which she uses to take wonderful pics on her food blog: http://www.moderateoven.com
Thanks for stopping by!
This one 🙂
http://www.amazon.com/Canon-75-300mm-4-5-6-Telephoto-Cameras/dp/B00004THD0/ref=sr_1_2?ie=UTF8&qid=1336431804&sr=8-2
Oh – awesome…I’ll check it out!
Oh…and I meant to tell you – the pictures on your blog and the ones you took of Katie are really awesome!! You do a wonderful job. I would’ve had no idea you hadn’t been “trained”.
🙂
That looks like a good lens…same zoom I have for my hockey pics. Let me know if you have a place where you’re showcasing your pics, Lisa. I would love to see them! And thank you for the nice comments! 🙂
Pics are great! For outdoor shots in manual mode on a sunny day…up up up that shutter speed! My recommendation for you if you take a lot of portraits would to research or buy the 50mm 1.8 🙂 It is super cheap and it is one of my favorite lenses!
http://www.the-digital-picture.com/Reviews/Canon-EF-50mm-f-1.8-II-Lens-Review.aspx
Thank you for the tip!! I would have never thought to increase the shutter speed (but then again, that’s why I don’t get paid, lol!). I appreciate the advice…and I will definitely look into that lens. I would also be interested in any suggestions you have for a good lens for hockey. My current one is just okay (http://www.amazon.com/gp/product/B0007Y794O/ref=oh_details_o05_s00_i01), and I know I need something “faster” but I’m not experienced enough to know what that entails exactly. Thank you for the help! And thanks for commenting!
Love Katie’s pictures!! You did an awesome job!!
I know how hard it is to say yes to friends when they ask you to take some portraits… DON’T say no!!! Friends relax with you and its great practice. I fought with a friend for a long time before I agreed to photograph a wedding… before you knew it I was doing more and more…. the pictures got a lot better the more I did!!
Thank you so much, Shelley! I cannot deny that saying yes to Katie was one of the hardest decisions I’ve had to make, but the fact that it had to be done so quickly really made it impossible to say no, lol! And you’re right–it was great practice, though I worried about how my “practice” shots would turn out, knowing how important they were. Thank for commenting…I’d love to see your photos, as well! 🙂
Do you know the Sunny 16 rule? On sunny days, set your camera to F16 and your shutter speed to 1/ISO (so 1/100 if your ISO is 100, or 1/400 if it’s 400, etc).
No, I did not know that! Thank you so much for the tip! I’ll try it next time! Thanks for commenting!
I came over from Katie’s Blog. I do photography on the side and have been learning studio photography. Outdoor photography scares the crap out of me. I did an engagement shoot and they turned out ok. But it’s so hard for me to get the eyes to pop and to get catch lights in them when I’m outside. I just wanted to post and say that I agree with your hubby on the wheat photo – I like the second one TONS better. It brings out the color in her hair and her face isn’t quite so “shadowed”. Lack of better word- but it’s brighter in the second one. And I have to say that’s my favorite shot of the bunch! 🙂 I have been contacted to do photos for a family in honor of their parent’s anniversary. It’s like 11 adults and 9 kids or something. I’m in panic mode BIG TIME! Ahh!
Ha ha, glad I’m not the only one terrified by outdoor portrait photography. 😉 Come back and share your pictures with me when you’re done…I’ll look forward to seeing them and hearing how the shoot went!
I love this post because I think it’s what photography is all about – trial and error. Do you have a reflector? It’s a great thing to keep in the camera bag and they are relatively cheap – mine was $30. This can help fill in some of those shadows on the face when you’re shooting in sunny conditions and using the natural, available light. You can also practice this by using a white paper or Styrofoam plate. Just hold is near the face and slowly inch in. You will see the difference it makes. The natural light will bounce off the reflector and help fill in those dark shadows when the natural light is too harsh.
Thank you, Katie! I have read about reflectors but wasn’t able to find one before the shoot. I even tried to locate my silver car shade as a quick fill-in, but I couldn’t find it! 🙁 I do plan to get one, though! Thanks for commenting–I really enjoyed the beautiful pictures on your site!